Final project
Introduction
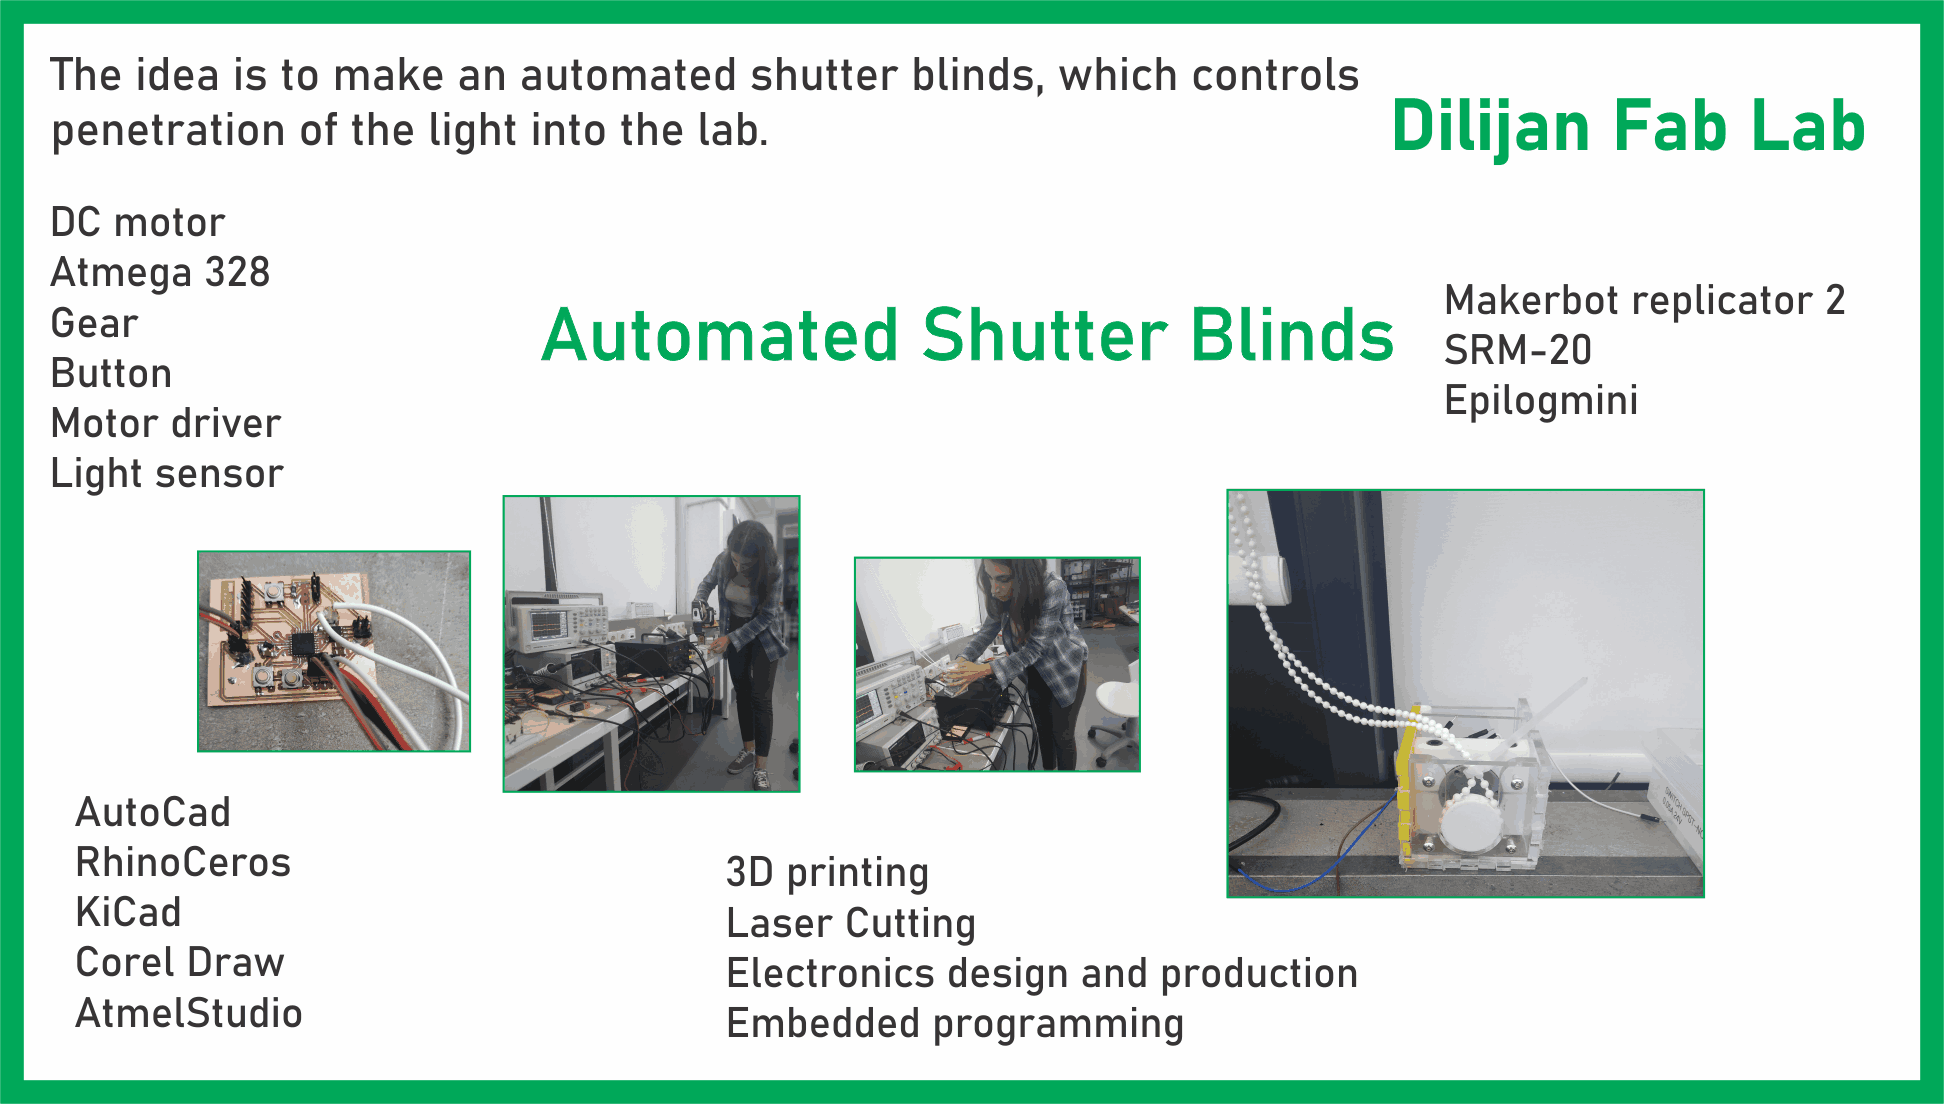
The final project is about shutter blinds automation.
I decided to make an automation system
for the blinds of Dilijan Fab lab. Once I came to
Fablab on Saturday and there was a strange smell that was burning air filter.
The fire
began from sunlight and magnifying glass.
I think that automation of shutters will be usefull for the lab.
Start
My first action was creating of my action plan
• Write functions of the potential device
• Make a list of necessary tools, material, components, machines
• Choose softwares I will be use during project development
• Define all actions of the device.
I looked for this tyope of projects and found many solutions and companies doig this kind of devices.
I read books and articles about motors, electronics
• About motors
• Electronics for you
• Induction motor vs synchronous: What’s the difference?
• how to make fabduino
• Types of gears
All theses were very informative for me.
Finally I chose the components I will use
• Dc motor Jameco 253471• Motor driver A4953
• Atmega 328 P microcontroller
• Switches
• Light sensor
• Resistors, capacitors etc.
List of materials and machines I used
• PLA filament and 3D printer (Makerbot replicator 2)• Laser cutter (Epilog mini 40w) and plexiglas
• Cnc milling machine (Srm-20 and shopbot)
• Avr programmer
• Measurment tools
The process
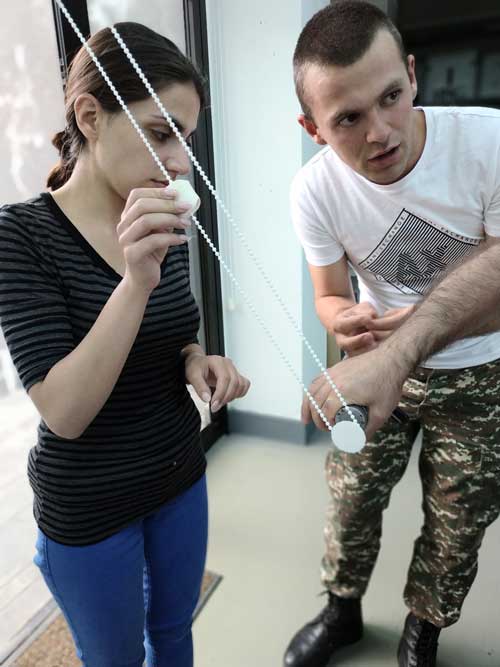
I tried to do all parts of my project during our educatinal process. The first step was learning how to operate with machines I needed. Measured the shutter blind, whhich I was going to automate. After I started make sketches of the gear I used.
Then I started learning both Fusion 365 and Rhinocerso5 3 modelling softwares. And started make my first models. As I modeled and printed the first gear we tested the motor.
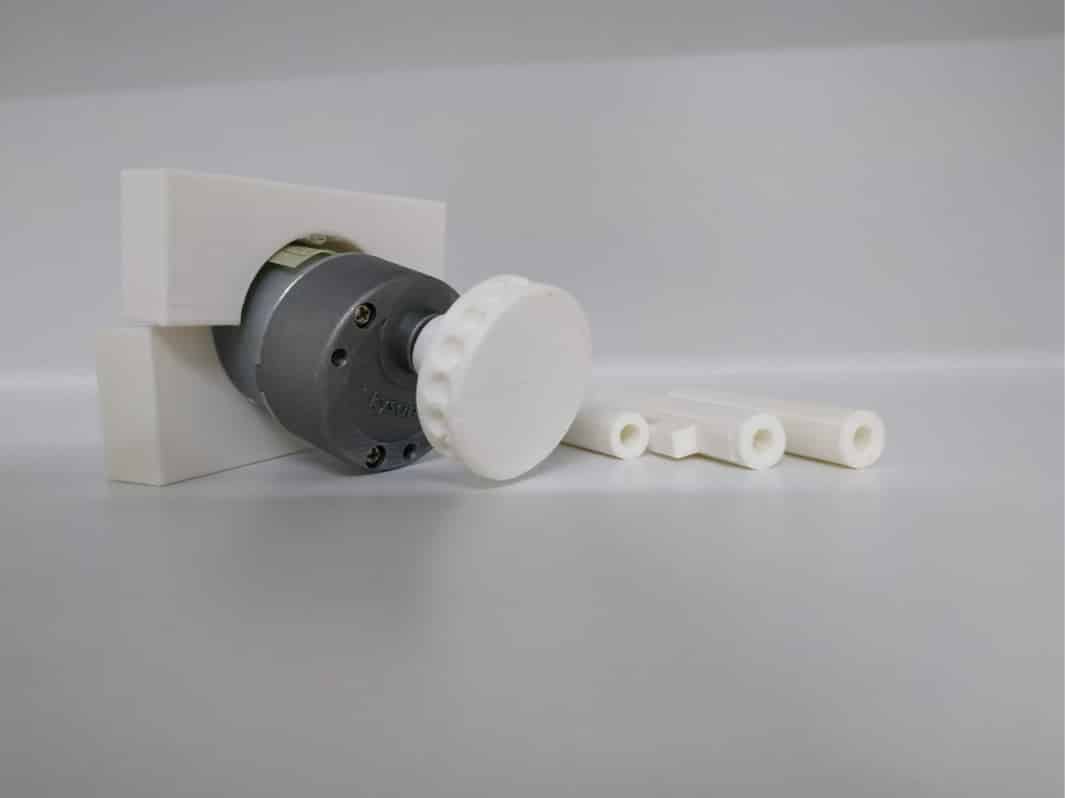
After the design the gear I printed it and tested with motor and shutter blind.
The motor was good, but I need to change some parameters in my gear. I started drawing the board, I draw it by KIcad software.
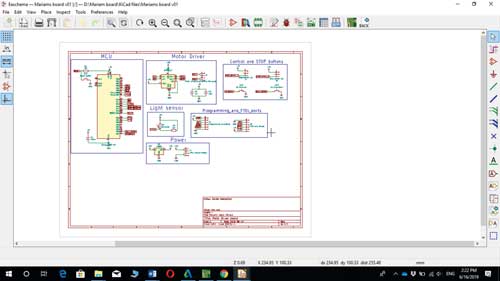
 It was difficult, but I finally finished, after cut the board.
I cut and soldered it different times till I got the result I wanted.
It was difficult, but I finally finished, after cut the board.
I cut and soldered it different times till I got the result I wanted.
Here the first version of the board
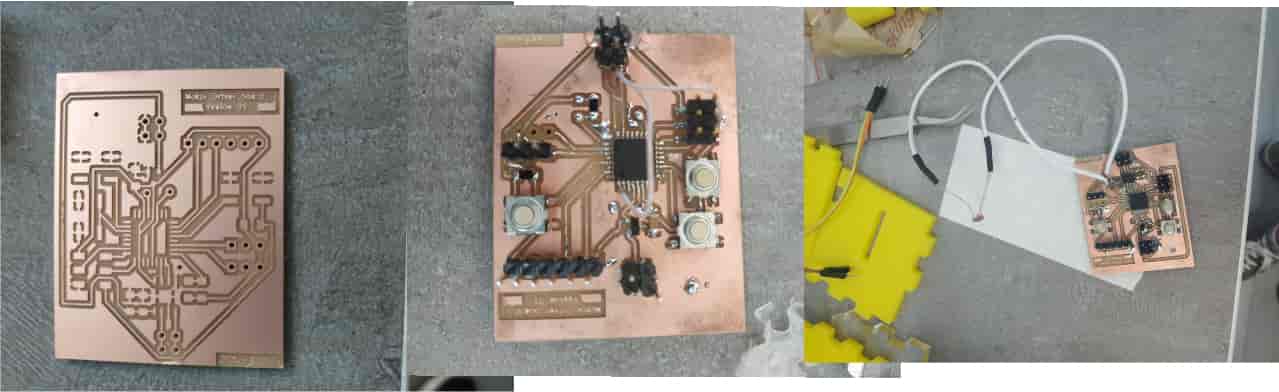 ready board
After I started porgramming part and it was really difficult, as Im an new in this field. I used Atmelstudio7 as software programming, I tried many times and my microcontroller was programmed. I used Avr programmer, and also used Arduino as a programmer. I did many tests.
After programming I printed the new version of the gear and it fitted perfectly on the pulling thread, Till I got the necessar quality of gear I had to draw and print gear 3 times.
I decided to tetst the gear and the motor and the board together and accidantly we gave high voltage and the motor driver have been demaged. And repeated all steps and made a new board, program it and test it again. The gear, motor, and the driver worked pefectly together. The second step was testing of light sensor. I had a little proble with it, I wanted to use SMD light sensor and ordered it from China and the shipping was late and I had to use legged simple light sensor. I was going to put the sensor on the window. When there is strong sunlight in the lab the sensor measureit and send the command to close the shutter and do the opposite, whent the sunlight becomes weak. I started makid box for my device I draw ir by RhinoCeros 5, I liked this soft very much, but Fusion is better, as it has free licnese.
Here the draft version of the box
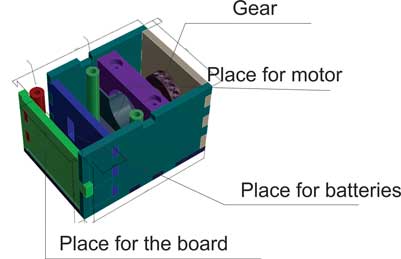 box design
After I draw it, I started cut some parts by laser cutter and print other parts by Makerbot 3D printers.
 Cut and print
Measured and didn't liked it, but I had to put all my components into it and after I Assembled all parts and put there all componnets and discover, that it
wasn't functional, the box were very big. I changed the sizes and added holes for connecting motor and pcb boxes together.
I cut and print all parts again.
Cut and print
Measured and didn't liked it, but I had to put all my components into it and after I Assembled all parts and put there all componnets and discover, that it
wasn't functional, the box were very big. I changed the sizes and added holes for connecting motor and pcb boxes together.
I cut and print all parts again.
 Assembled box
Testing
As alwayas we had different problems with microcontroller, motor driver, light sensor by the end and we hadn't time, but we solved our problems and the second tes was succesfull.Here you can see the video about the project
• Presentation about the final project
• Video clip
I am going to develop my project in future use magnets, put light sensor on the window, use solar energy and finally automate all shuter blibds.
Job done during other weeks
• Started design of the box
• Started development of the board
• Started programming the board
• Started controling motor
The cost of my final project is 50$. I used 30 gr PLA, filament, 2 pieces of plexiglas (300mm*600mm), components approximately 15 $ and other.
During the making and development process Fab Lab team helps me during testing, setting up the machines.
Here are the files of my final project
• KICAd files
• Box 3D model
• Gear files
• Box AutoCad
• Program
The current version of my final project should be developed and It would be open source and any interested person would be able to use files and make it.